Hello again! You can make a lot of cool visual effects in Adobe Illustrator using the Gradient Mesh. That's why this Illustrator tutorial about the Mesh Tool. We will create abstract background with vertical lights and colorful text. Let’s start!
You can find all Illustrator tutorials from this blog using this link → CLICK HERE

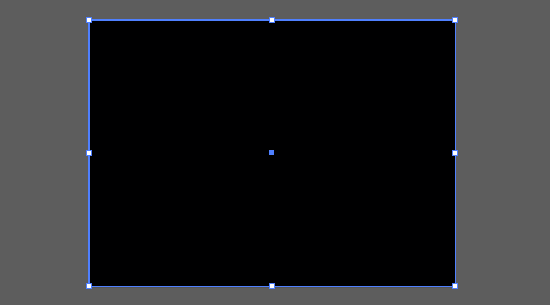
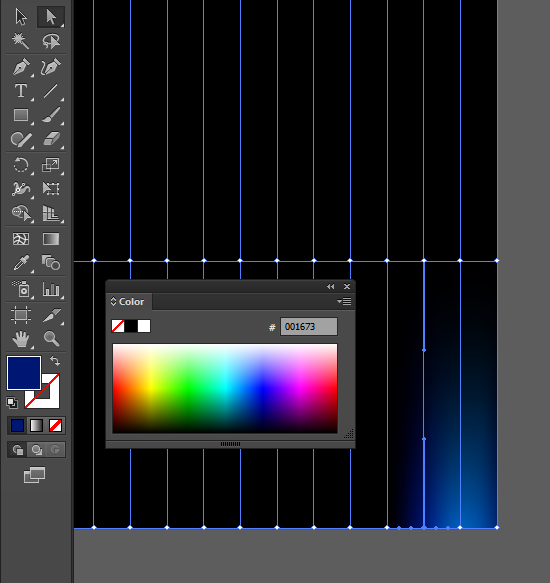
Create the new document (Ctrl+N) with horizontal orientation. Take the Rectangle Tool (M) and draw the rectangle fit to the Artboard. Turn off the Stroke and set black Fill for this rectangle.
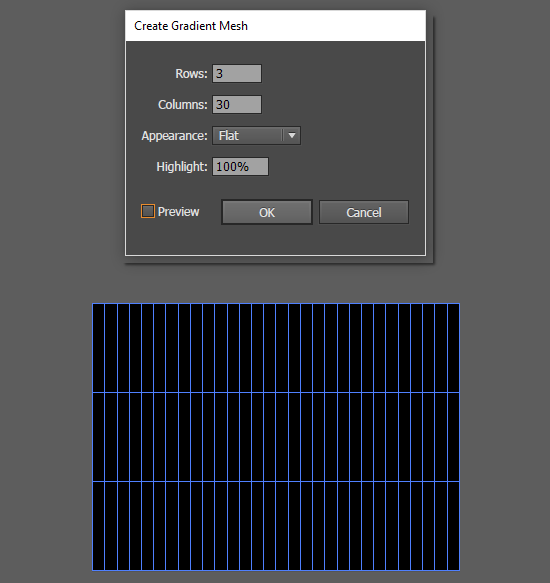
Select this rectangle and go to the menu Object > Create Gradient Mesh. Set 3 rows and 30 columns.
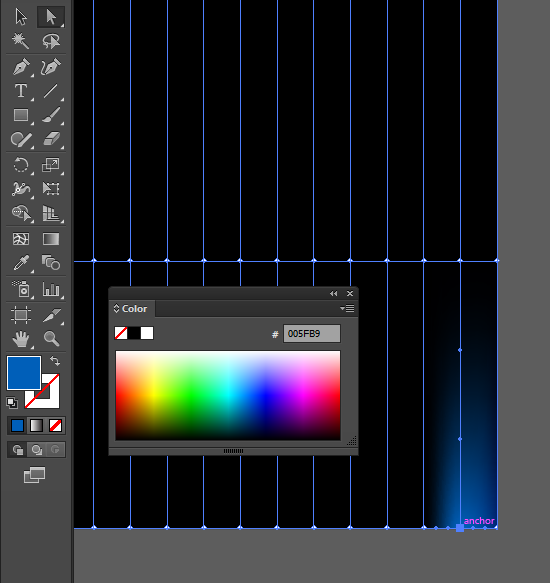
Take the Direct Selectin Tool (A) and select bottom right anchor point of the Mesh Grid. Use the Color panel for the colorization.
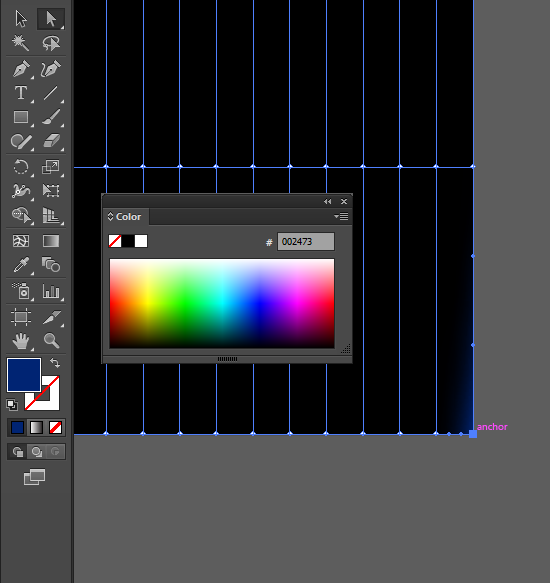
Select next anchor point and set another color. It will be great if the colors are combined.
Next step is the same.
This work is a little tedious but you can do it.
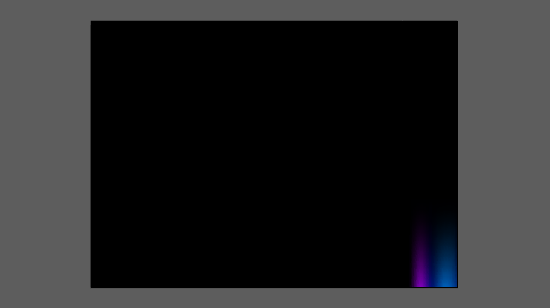
You should paint all the points in a row.
Then color the top row.
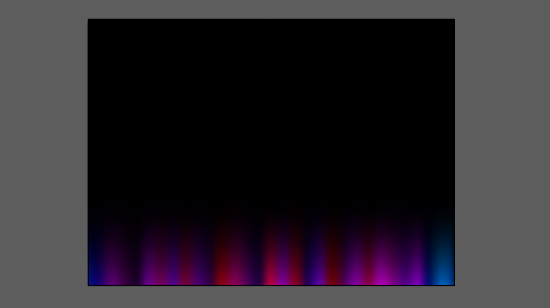
Take the Direct Selectin Tool (A) and select the next row. Move this row a little lower.
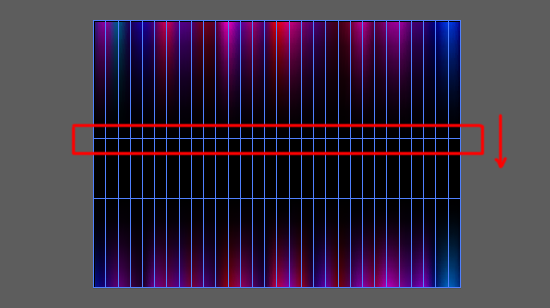
The next row move a little higher.

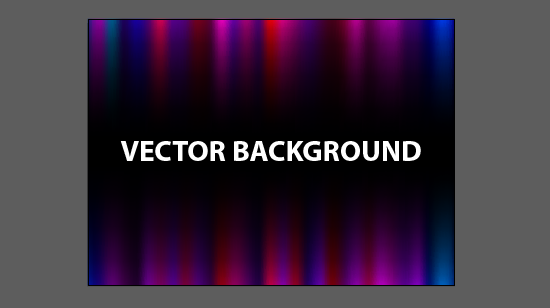
Take the Type Tool (T) and print any text.
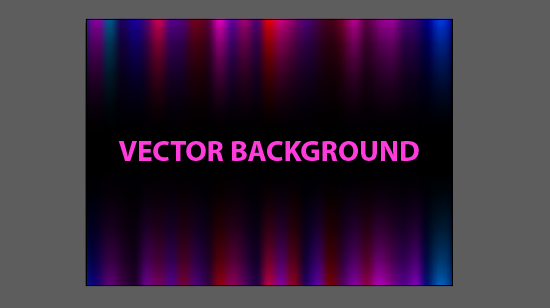
You can choose any color for your text.
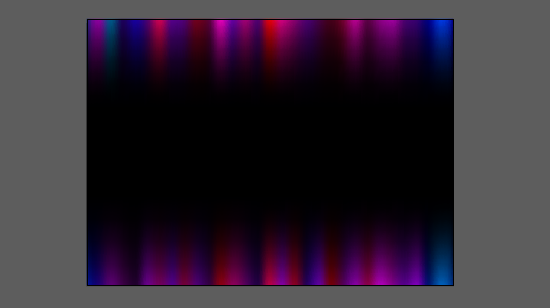
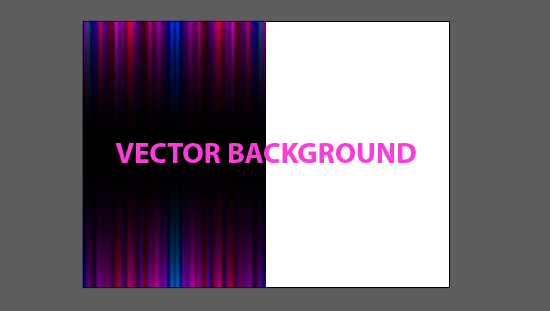
And now the little trick to make the background more interesting. Select the Gradient Mesh background and go to the Transform panel. Set Reference Point to the upper left corner and turn off the Proporcions. Now type the W Value equal to half the Artboard.
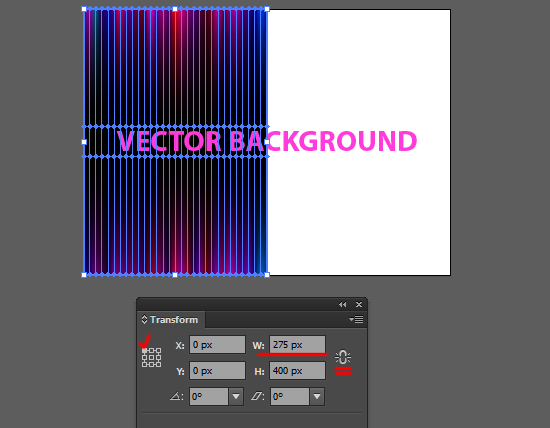
The whole background turned into a half. Now reflect this background to the opposite side by the Reflect Tool (O).
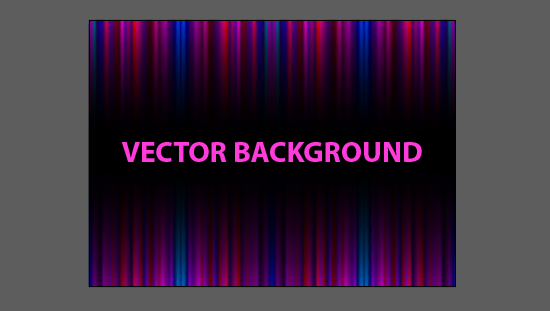
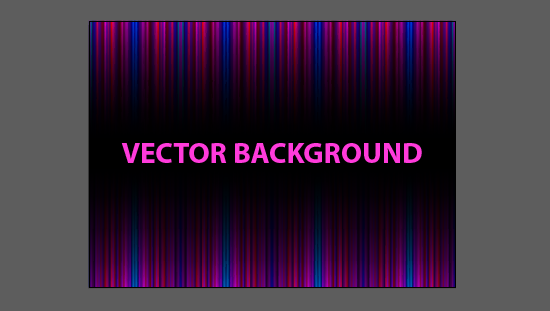
Next step is the same.
Compress in half and reflect.
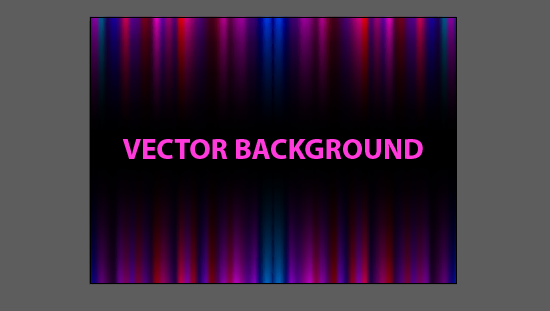
Finally you can create such background.
I made the text multi-colored. Looks much better.
Tutorial is over. If you like this article, please leave a comment here or share! You may also thank me using referral links → CLICK HERE
You can find all Illustrator tutorials from this blog using this link → CLICK HERE
Create the new document (Ctrl+N) with horizontal orientation. Take the Rectangle Tool (M) and draw the rectangle fit to the Artboard. Turn off the Stroke and set black Fill for this rectangle.
Select this rectangle and go to the menu Object > Create Gradient Mesh. Set 3 rows and 30 columns.
Take the Direct Selectin Tool (A) and select bottom right anchor point of the Mesh Grid. Use the Color panel for the colorization.
Select next anchor point and set another color. It will be great if the colors are combined.
Next step is the same.
This work is a little tedious but you can do it.
You should paint all the points in a row.
Then color the top row.
Take the Direct Selectin Tool (A) and select the next row. Move this row a little lower.
The next row move a little higher.
Take the Type Tool (T) and print any text.
You can choose any color for your text.
And now the little trick to make the background more interesting. Select the Gradient Mesh background and go to the Transform panel. Set Reference Point to the upper left corner and turn off the Proporcions. Now type the W Value equal to half the Artboard.
The whole background turned into a half. Now reflect this background to the opposite side by the Reflect Tool (O).
Next step is the same.
Compress in half and reflect.
Finally you can create such background.
I made the text multi-colored. Looks much better.
Tutorial is over. If you like this article, please leave a comment here or share! You may also thank me using referral links → CLICK HERE
Comments
Post a Comment