Hello! This is a tutorial for beginners. We will draw a heart in Adobe Illustrator using simple shapes. The heart is a very common symbol. So it will be useful for any design or illustration.

Take the Ellipse Tool (L) and draw a circle. Hold Shift button while drawing. So you will get a circle and not an oval.

Make a copy of the circle. You can use Ctrl+C and Ctrl+V. Align circles with the help of the Align panel.

Select both circles and open the PathFinder panel. Click Unite to combine circles into one shape.

Now take the Direct Selection Tool (A) and select the anchor point in the middle. Then pull down this point.
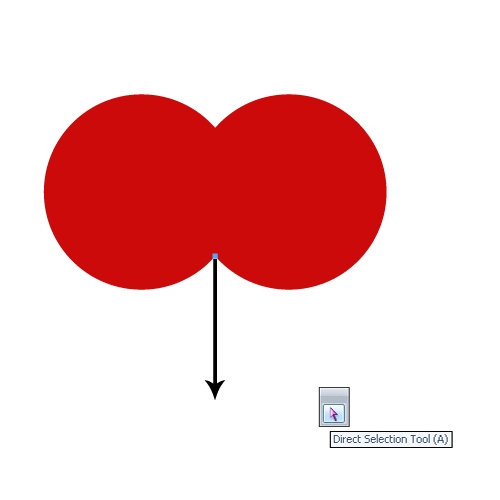
You should to get the shape as on the picture below. Hold Shift button while pulling down.

You can see two anchor points on the picture below. You should delete them.
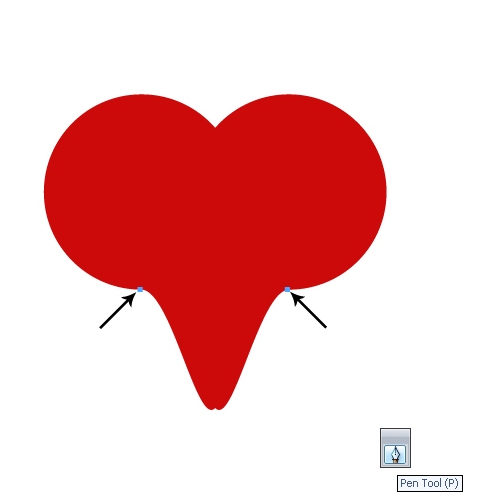
Take the Pen Tool (P) and click to the anchor point to delete it. You can use Delete Anchor Point Tool also.

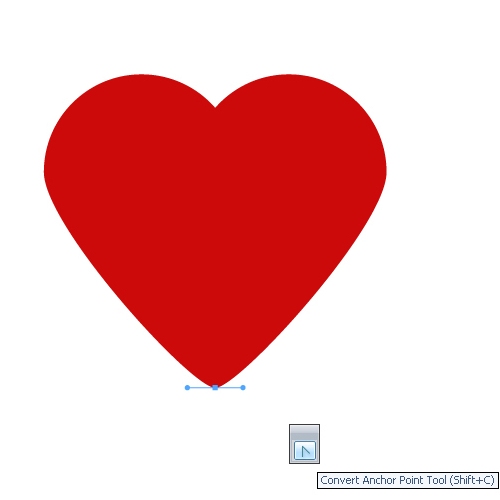
The bottom anchor point does not look very good. So take the Convert Anchor Point Tool (Shift+C) and click to this point to fix it.

You can pull a little to the side by the Convert Anchor Point Tool (Shift+C) to add a rounding.
Then take the Direct Selection Tool (A) and select sides of the heart.
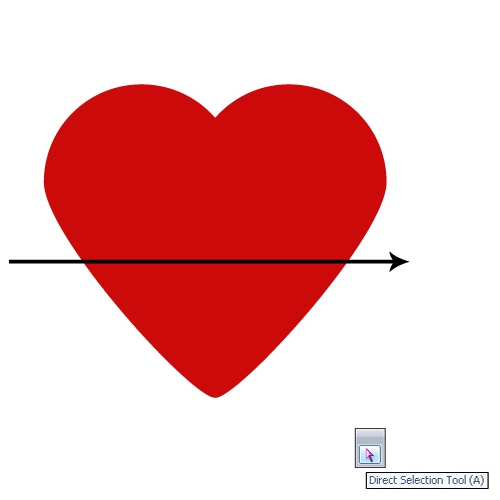
Now press the down arrow on the keyboard several times.

Use the ellipse with radial gradient fill to create the shadow.
Heart is ready! You're doing fine :)
If you like this article, please leave a comment here or share! You may also thank me using referral links → CLICK HERE
Take the Ellipse Tool (L) and draw a circle. Hold Shift button while drawing. So you will get a circle and not an oval.
Make a copy of the circle. You can use Ctrl+C and Ctrl+V. Align circles with the help of the Align panel.
Select both circles and open the PathFinder panel. Click Unite to combine circles into one shape.
Now take the Direct Selection Tool (A) and select the anchor point in the middle. Then pull down this point.
You should to get the shape as on the picture below. Hold Shift button while pulling down.
You can see two anchor points on the picture below. You should delete them.
Take the Pen Tool (P) and click to the anchor point to delete it. You can use Delete Anchor Point Tool also.
The bottom anchor point does not look very good. So take the Convert Anchor Point Tool (Shift+C) and click to this point to fix it.
You can pull a little to the side by the Convert Anchor Point Tool (Shift+C) to add a rounding.
Then take the Direct Selection Tool (A) and select sides of the heart.
Now press the down arrow on the keyboard several times.
Use the ellipse with radial gradient fill to create the shadow.
Heart is ready! You're doing fine :)
If you like this article, please leave a comment here or share! You may also thank me using referral links → CLICK HERE
Hello! This is my first visit to your blog! We are a group of volunteers and
ReplyDeletestarting a new initiative in a community in the same niche.
Your blog provided us useful information to work on. You have done
a extraordinary job!